Part 6 of a Socially Distant Wargame
The Battle of Distanza, 15 June 1746
Phase 5, c.1.20pm
As the two formidable commanders (Ray and Lee!) come into
close combat the fickle Gods of War increasingly roll their dice with glee as
chance mingles in an unsavoury fashion with tactical ability and careful
planning.
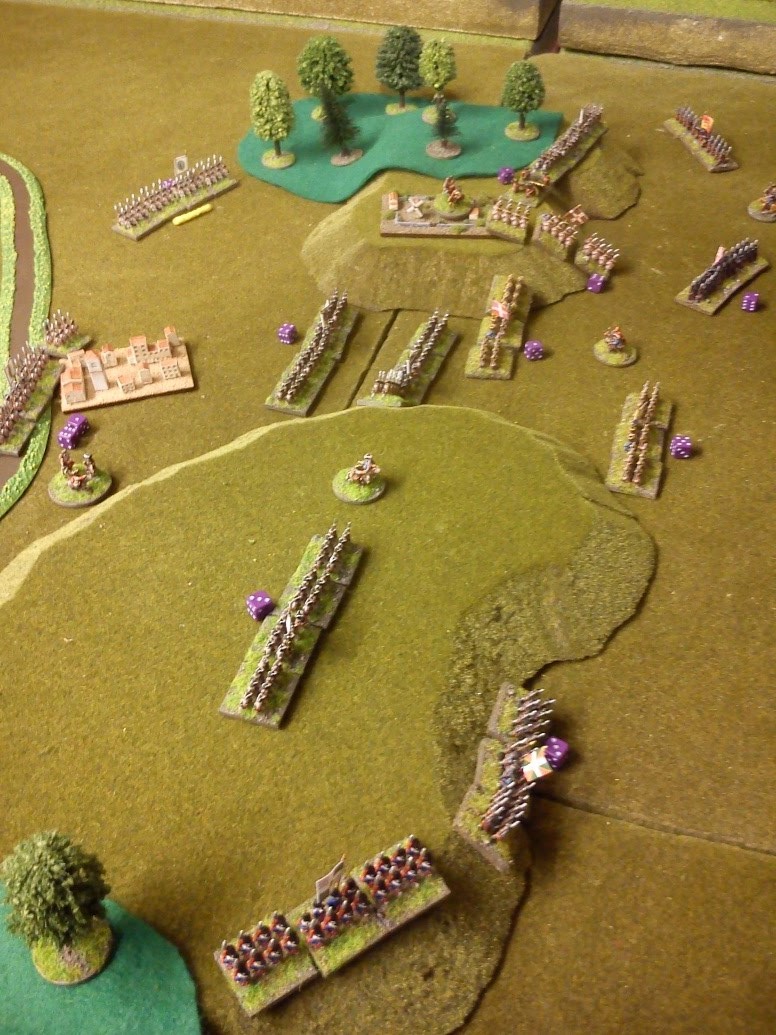
At the end of the last instalment the situation was as
follows at about 1.20pm:
The French 3rd brigade decide to renew their assault on the Central
Heights and decisively wipe out troublesome gunners.
Meanwhile, around Sociale the French awake from their
slumber…
…as the Austrian dragoons move to threaten the French rear
in the west.
On the Eastern Heights, the Austrian 2nd brigade redress
their ranks, only to deliver desultory volley fire on the approaching French.
However, after an explosive volley from Artois Regiment, IR8
Hildburghausen is sent reeling from the Central Heights and beyond Distanza.
Whilst close by on the Eastern Heights, both IR1 Kaiser and
IR35 Waldeck refuse to charge from the protection of the high ground. Thus, allowing Languedoc and Navarre
regiments to seize the initiative and charge up the slope towards the farm and
against IR35 Waldeck.
The weight of numbers is too much and IR35 Waldeck is thrown
back in disarray.
The situation at 1.40 with the Austrian position on both
heights looking vulnerable
The situation across the whole field of battle as command
and control gradually breaks down on both sides. Sorry about the blurred picture.
The French 1st brigade seeks to take advantage to punch a
hole towards Distanza, but their musketry proves to be ragged at best. Too many muskets becoming fouled with
gunpowder and paper perhaps.
Further to the west, the French 3rd brigade
assault the Central Heights with the Grenadiers and Aunis regiment whilst
continuing to harass the increasingly dangerous Austrian dragoons just to the
south.
But perhaps relief in the centre is on the way for the
Austrians as IR27 Baden Durlach returns to the fray.
French pressure mounts as the French 2nd brigade make their
bid to capture the Eastern heights.
However, IR36 Browne and the remaining gunners show immense discipline
and fire control to…
…destroy the effectiveness of Montfort Regt and send Navarre
Regt spinning back in disorder.
Further west, the Austrian dragoons now seem to be preparing
to make an impact. Perhaps about time
too, some of you may say. It has taken
them over two hours to get there.
Back on the Eastern Heights.
Despite destroying the Montfort Regt, IR36 Browne now finds that the
Clare Regt (those Irish wild geese get everywhere) has charged their flank.
Meanwhile IR10 Jung Wolfenbuttel on the Central Heights has the
French grenadiers on their flanks despite first releasing a well ordered volley
to despatch the frontal threat from Aunis Regt.
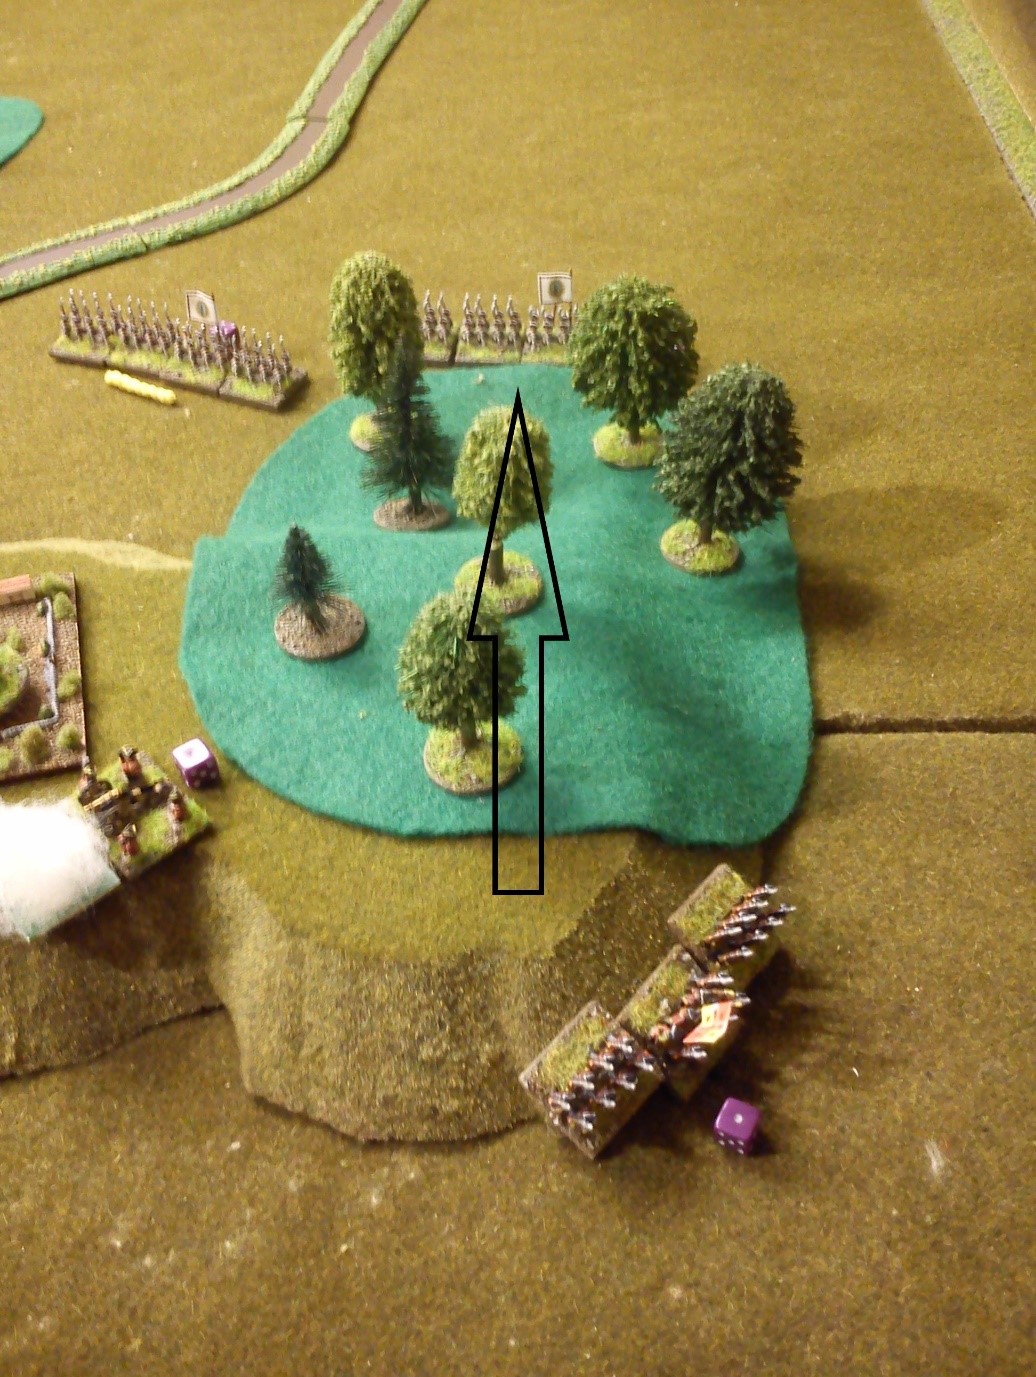
But on the eastern flank of the battle, it seems that IR36 Browne
can shoot but it cannot melee as Clare regiment beats them roundly and sends
them scampering through the woods.
After a remarkably close and bitter struggle for dominance
on the Central Heights, the French grenadiers already exhausted from their
previous actions are unable to force the issue with IR10 Jung Wolfenbuttel, who
send them back into Sociale to drown their sorrows.
But French fortunes fare better on the Eastern Heights,
where the Clare Regt exploits their success to clear the heights of the enemy
by charging and slaughtering the last Austrian gunners.
And so, the state of the battle at 1.55pm is as follows.
The French have spilt considerable blood to successfully
capture the Eastern Heights. Meanwhile
the Austrians have shown remarkable tenacity to continue their (albeit shaky) dominance
of the Central Heights. The Austrian
dragoons now seem set to affect the course of events. Whilst the heavy cavalry conflict in the east
has petered out… for the moment.
Both armies have started reaching levels of exhaustion. But the morale of both is so far standing up
to the test. Hurried reports from
speeding couriers and adjutants are flowing into the commanders with news about
the combat effectiveness of their forces.
Will this have an impact on the next orders?
Until the next instalment.