Four Rejects got together for a Napoleonic bash last Sunday. Postie reffed the game
while Lee, Surj and myself picked out side out of the hat.
I picked out Marchal Bernadotte (Overall commander) commanding the Saxon army
Surj picked out General Count Wrede commanding the Bavarian army
and Lee picked out Archduke Charles commanding the Austrian forces
Lee's report can be found
here.
Order of Battle
Saxonn /Bavarian Army - IX Corps C/O Marshal Bernadotte (Ray)
1st (Saxonn) Division c/o GL von ZezSchwitz
1st Brigade c/o Gm Von Hartitzsch
Liebgrenadier Garde (1) (Guard)
Combined Grenadiers Radeloff (1) (Elite)
Combined Grenadiers von Bose (1) (Elite)
Combined Grenadiers Winkelmann (1) (Elite)
Combined Grenadiers Hacke (1) (Elite)
1st Schurzen Light Infantry (1) (Line)
Medium Gun Battery
2nd Brigade c/o Gm von Zeschow
Konig (1) (Line)
Niesemeuschel (1) (Line)
Von Obschelwitz (1) (Line)
Von Dyherrn (1) (Line)
Light Gun Battery
Cavalry Brigade c/o Gm Freiherr von Gutschmid
Garde du Corps (Guard)
Karbineer Rgt (Elite)
Prinz Clemens Cheval-Legars (Line)
Hussar Regt (Line)
2nd (Bavarian) c/o Gl Count Wrede (Surjit)
1st Brigade c/o Gm Minucci
No6 Laroche Light Infantry (1) (Line)
No3 Prinz Karl (2) (Line)
No12 Line (2) (Line)
Medium Gun Battery
2nd Brigade c/o Gm Beckers
No6 Herzog Wilhelm (2) (Line)
No7 Lowenstein (2) (Line)
Medium Gun Battery
Cavalry Brigade c/o Gm Preysing
No2 Konig Cheval-Legars (Line)
No3 Leinngen Cheval-Legars (Line)
Reserve
Heavy Gun Battery
Austrian Army c/o Archduke Charles (Lee)
Avantgarde c/o FML Nordmann
1st Brigade c/o GM Peter Vecsey
No12 Primatial Hussars (Elite)
No58 Beaulie (2) (Line)
Lower Manhartsberg Landwehr (1) (Militia)
1st Jagers (Rifle) (1) (Elite)
Light Gun Battery
2nd Brigade c/o Gm Mayer
No4 Deutschmeister (3) (Line)
No49 Kerpen (3) (Line)
Untere Wiener Wold 5thB Landwehr (1) (Militia)
Untere Wiener Wold 6thB Landwehr (1) (Militia)
Reserve Corp c/o FML Prochaska
3rd Brigade c/o GM Steyner
1st Combined Grenadiers Hahn (1) (Elite)
2nd Combined Grenadiers Hromode (1) (Elite)
3rd Combined Grenadiers Legrand (1) (Elite)
1st Combined Grenadiers Demontant (1) (Elite)
1st Combined Grenadiers Berger (1) (Elite)
Heavy Gun Battery
Cavalry Reserve c/o FML Hessen-Homburg
5th Brigade c/o Roussel
No2 EH Franz Curassiers (Elite)
No3 Herzog Albert Curassiers (Elite)
6th Brigade c/o GM Rothkirch
No1 EH Johann 3rd Dragoons (Elite)
No6 Riesch 4th Dragoons (Elite)
Horse Artillery Battery
7th Brigade c/o GM Wartensleben
No6 Blankenstein Hussars (Elite)
No3 O'Reilly Cheval-Legers (Elite)
Horse Artillery Battery

The set up.
This is the view from behind the Austrian Cavalry. Postie set up the game which was a meeting engagement between two river crossings in Moravia. The Saxon/Bavarian forces outnumber the Austrians, but there army is made up of predominantly Elite units.
So its the old adage quantity over quality????
The Austrians infantry are set up on a ridge, while their horse sweep round in a curve to the Allies side of the table.
The Saxon and Bavarian infantry
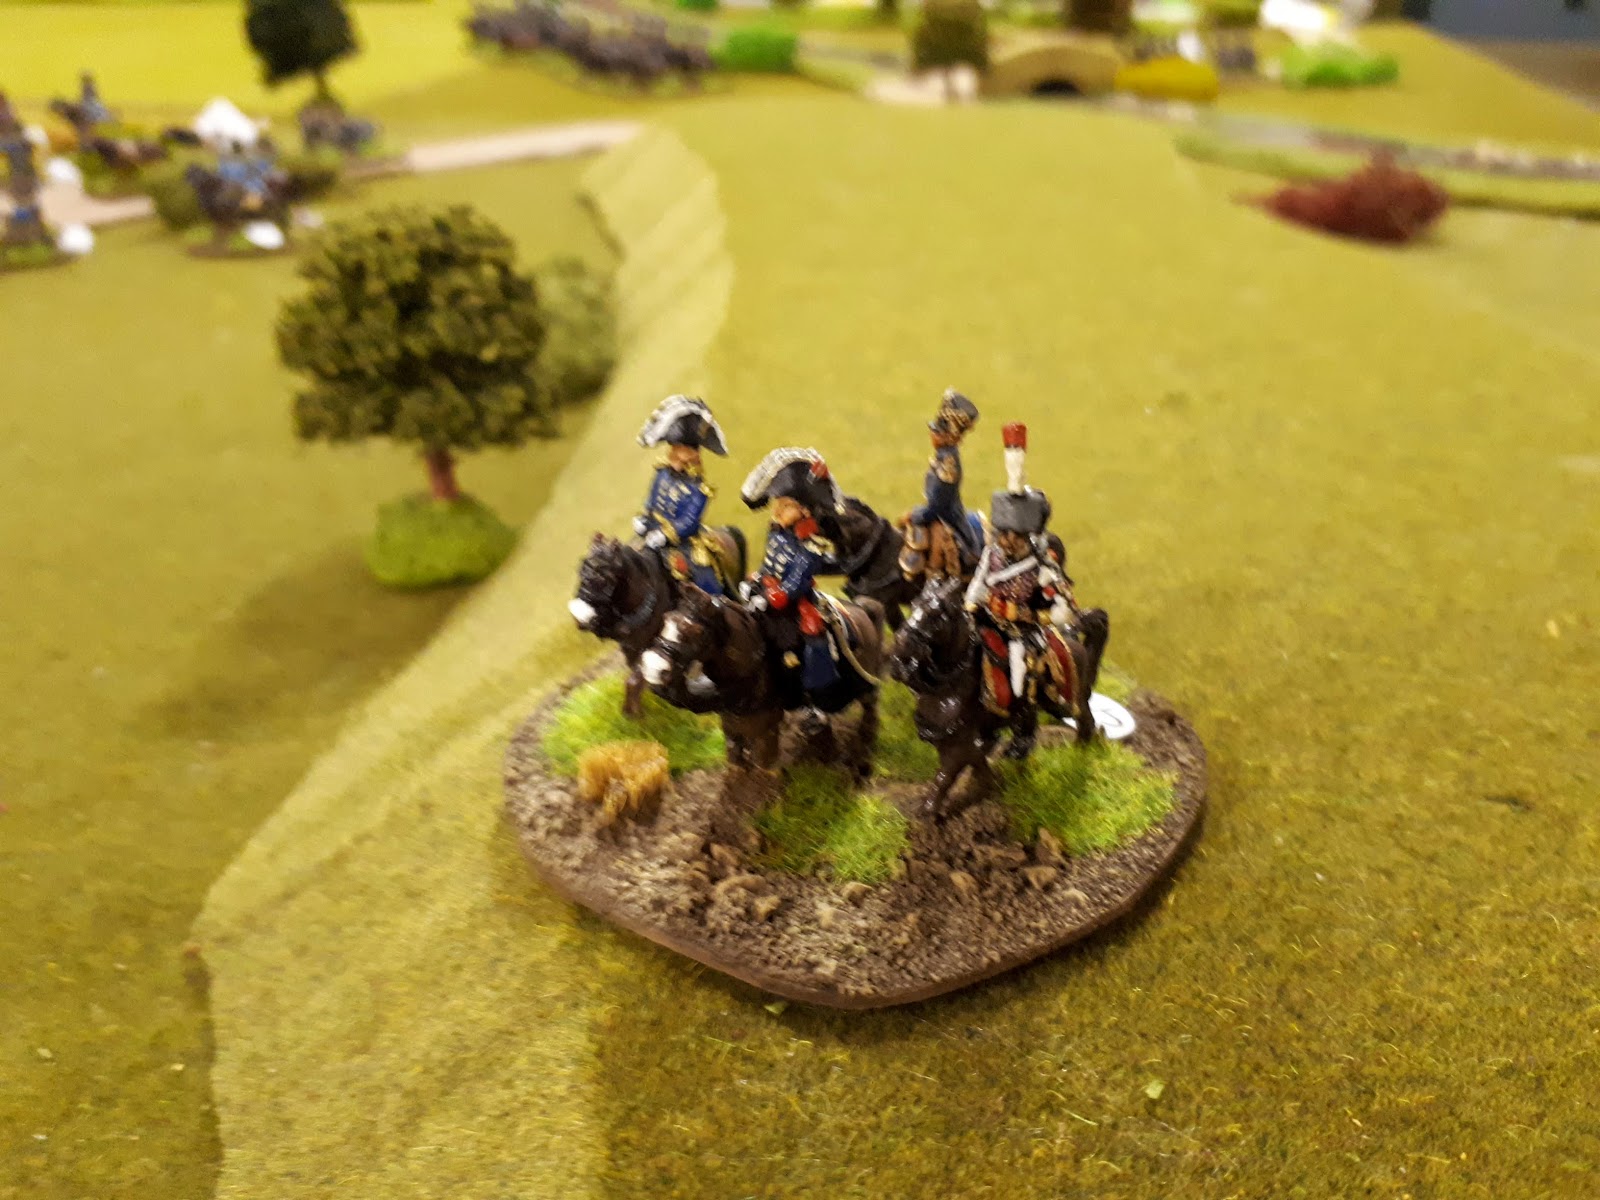
Marshal Bernadotte
It doesn't look good for the Austrians from the start, Can they use their Elite troops
to hold the onslaught?
The majority of the Austrians on the ridge and between the ridge and wood are line class and
Landwher.
Our plan was simple.
The Bavarians would be the main attack force, My infantry would support the attack on the ridge
but I would hold my second line back, which included Grenadiers and Leibguard, incase Lee
came sweeping through the gap with his Horse. There was no way my horse could move past the wood and hedge into the open ground to face all 6 of Lee's Elite Horse regts. So the plan was to goad Lee forward and attack us where nobody would have an advantage.
We were unsure what to do with the Bavarian Horse (centre right)
So kept them in the rear as support. Our only Heavy artillery piece can be seen trundling down the road, miles behind all the action.
Forward!!!!
Lee made a boo boo, forgetting to unlimber his artillery on the hill.
I edged forward with my horse, mainly to fit in another unit in the frontline, which just so happened to be the Guard du Corps!!!!
Lee's not very confident with Nappies and this didn't help his cause.
He made a big boo boo, unlimbering his horse artillery so far away. He should have pushed them
way forward and pounded my Horse to force me out.
At the start of Turn 3 the Austrians had some reinforcements arrive, way out on Surj's right flank.
They're a bit of a mish mash of troops, so hopefully won't hinder our plans.
Lee finally moves his artillery up supported by the Horse.
The Austrians reinforce the ridge with some Grenadiers
Lee moves 3 Horse regt to match mine and fit through the gap.
We're in charge range for next turn.
Lee's glasses kept falling off, so Postie gave him a helping hand!!
Lucky we left the Bavarian Horse on the flank, the Austrians have an
Elite Hussar regt prowling about. Surj counters it by deploying our heavy gun in its direction.
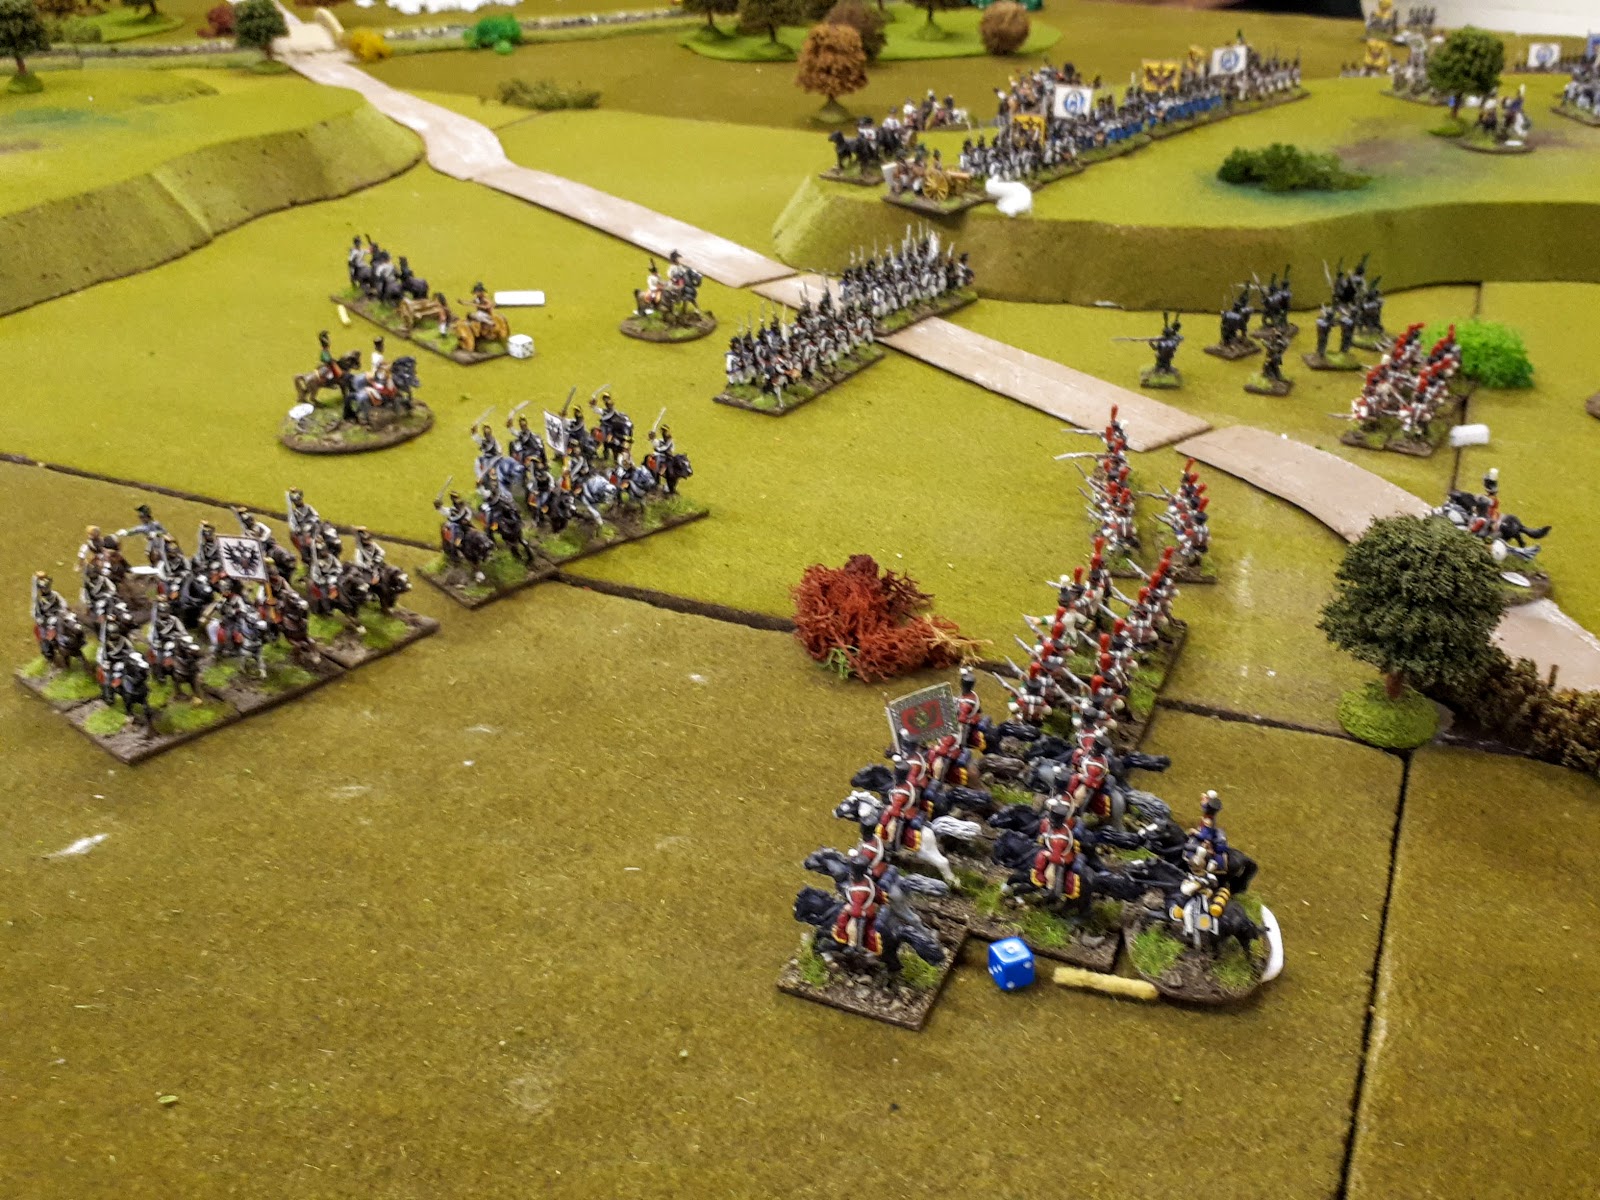
And we're in!!!
And we're in here as well!!!
Both my and Surj's charges are successful, knocking back our opponents.
Surj's columns carry their charges forward into 2 fresh units, my two do the same one slamming into Lee's artillery routing it.
I came off worse in the Cavalry bash, only winning 1 melee, (the one on the left).
My Guard du Corps get absolutely smashed by Lee's best dice roll ever.
Nine dice were thrown needing 5's and 6's
8 figures were lost leaving only 4 figures of the Guard left!!
WTF!
In the follow up charges Lee's unit is wiped out by my Hussars (top left)
My Guard are wiped out Boooo!!!! But I manage to save my flag, thank gawd! (in the centre)
And my Cheval Leger route, but stay on the table
BUT whilst destroying Lee's unit I killed his attached commander, which forced a brigade
morale check, which Lee disastrously failed throwing the dreaded snake eyes.
This meant the whole brigade dispersed!!!
Leaving Lee's attack in tatters!
Next turn I charged Lee's Guard killers with my last remaining regt of Horse the Karabineers
I also moved up my Hussars to attack Lee's two fresh units, moving two units of Grenadiers up to help.
Surj fired his heavy artillery and routed the Austrian Hussars
Lee tried to reform his lines, but had effectively lost control of his left flank.
In fact the whole front line had turned round
Surj moved around the flank while I moved up the hill.
Lee lost the last of his original Horse regts in this melee, I luckily only lost 2 figures.
So they were now free to move onto my left flank.
Moving the Grenadiers up I shot at the static Austrian Horse, I had hoped for more
than 2 casualties?
Poor Lee gave up the ghost at this point.....poor chap, It just wasn't his day at all!!!
Even though Lee hand thrown in the towl, Postie added up the points just to rud salt into his wounds.
It was a 30-4 victory for the Saxons and Bavarians, or as Postie put it An absolute thrashing!!!
Conclusion
Well what can I say, It really wasn't Lee's day, he did have a few good dice rolls, including destroying my Guard du Corps, but I'm afraid that was his only high point.
He should have been more aggressive with the Horse and the Grenadiers, with his passive play he let me and Surj dictate the run of the entire game......silly boy!!
Gotta admit though I did feel sorry for the poor chap, as we soundly thrashed him!!